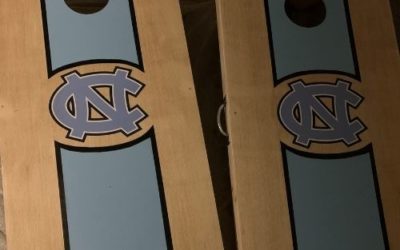
Building your own set of cornhole can be a fun and affordable way to enjoy the great game of cornhole. You might be building a set of cornhole for yourself, as a gift, or maybe even to sell as a product. We at Triangle Lawn Games decided to peel back the curtain on the detailed construction our popular cornhole sets and provide to you the materials and step by step instruction that all of our constructors use. You have come to the right place for detailed cornhole construction plans with materials and instructions.
Materials
- Five 8-ft 2x4s, choose boards without twists or cracks
- Two pieces of 2-ft x 4-ft plywood, ½-inch sanded pine
- Two handles 6-½-inches
- Four lock washers ½-inch diameter
- Four carriage bolts ½-inch diameter, 4-inch long, 13 thread
- Four wing nuts, ½-inch diameter
- 2-inch screws, galvanized
- 2-½-inch screws, galvanized
- Wood filler
- Sand paper
- 6-inch hole saw
- ½-inch drill bit
Steps for one set, multiply by number of sets:
- Cut four 2x4s to 48 inches
- Cut six 2x4s to 21 inches
- Cut four legs 11 inches long from end to long point. Cut 45 degree cuts on either side of flat end, and on angled end, angle is 22 ½ degrees from 11 inches back.
- Using 2-½-inch screws, connect two 21-inch 2x4s and two 48-inch 2x4s. Put shorter boards inside, so that once frame is created, it is 24 inches by 48 inches.
- Attach plywood to top using 2-inch screws. Predrill the holes to prevent splitting.
- Cut hole in top of both plywood boards. Make it centered 9 inches from the top and even distance (around 12 inches) from either side
- Connect a third 21-inch 2×4 to the frame, fitting it in the center of the plywood to prevent bounce. Use two 2-½-inch screws on either side to connect it to the 2×4 frame and one 2-inch screw in the dead center of the board to connect it to the plywood
- Drill ½-inch hole near end of each leg, making it 1-½-inch from the end and midway between the sides. This is where the carriage bolts will go to allow the leg to pivot.
- Use a ⅝-inch spacer between the end of the 2×4 frame and the leg, then drill through the ½ hole already created in the leg until it goes through the frame as well.
- Attach the legs with the carriage bolts, lock washers and wing nuts.
- Attach handles halfway up the left side of the frame (when looking at plywood side).
- Put wood filler in all screw holes on plywood top. If any other areas need it aesthetically, apply there as well.
- After wood filler dries, sand plywood top where filler was inserted.
- Sand frame at edges of 2×4, any rough places and wherever lumber company stamps are visible. Use orbital sander if you have one.
- Hand sand the inside of the 6-inch hole on top of the plywood.
- Extend legs and test if the board sits evenly on the ground. If not, mark then cut the longer leg until wobble is eliminated.
Related Blogs
How to Run a Successful Cornhole Tournament
In today’s world, people are looking for ways to get out and have a great time socializing with family and friends. They want to meet people and create memories through fun experiences. Lawn games have become a go-to vessel for these in-person interactions. They are a...
Advanced Cornhole Strategies and Tactics
Cornhole has taken the nation by storm going from a staple in backyards and breweries to tournaments and ESPN. While the casual game still accompanies social gatherings, being a professional Cornhole player is now a thing, and with it some impressive play. The top...
How to Paint Curved Lines on a Cornhole Board
One of the questions we get asked a lot regarding custom cornhole boards is "how do you make curved edges in paint on boards?" So we thought it would make sense to give you a step-by-step guide on how to make curved lines on custom boards. This is great if you make...


